Table of Contents
- Why the Right Accessories Matter From Day One
- The Essential Cycling Accessories Every Beginner Needs
- Clothing and Comfort Accessories for New Cyclists
- Useful Accessories to Add Once You're Comfortable
- What You Don't Need to Buy Right Away
- How to Build Your Beginner Cycling Kit on a Budget
- Frequently Asked Questions
- Conclusion
Just got a new bike? Discover the best cycling accessories for beginners — from safety essentials to comfort upgrades. Honest advice, zero fluff.
You bought the bike. You’re excited. And then someone asks: “Do you have lights? A lock? Padded shorts?”
Suddenly, you’re on a cycling accessories page at 11pm, knee-deep in helmet reviews and wondering why a water bottle cage has a 47-option dropdown. Welcome to beginner cycling — where the bike is only the beginning.
Here’s the good news: you don’t need to buy everything at once, and most of what actually makes a difference is affordable and easy to find. This guide is organised by priority — safety first, comfort second, performance upgrades when you’re ready — so you can spend wisely and start riding with confidence.
No jargon without explanation. No fake five-star recommendations. Just the honest list of cycling accessories every beginner needs, in the order they need them.
Why the Right Accessories Matter From Day One
Most people think of cycling accessories as optional extras — the stuff you buy after the bike, if the budget allows. In reality, the right accessories are what make the difference between a beginner who sticks with cycling and one who parks the bike in the shed after three weeks.
Safety gear keeps you protected. Comfort gear keeps you riding longer. And the right kit removes the small frustrations — saddle pain, dead lights, a flat tyre with no repair kit — that quietly chip away at motivation.
Think of it this way: no one quits cycling because they bought a helmet.
Safety First, Comfort Second, Performance Later
Before we dive in, here’s the framework this guide follows. Every accessory falls into one of three tiers:
- Tier 1 — Safety: The non-negotiables. You need these before your first ride.
- Tier 2 — Comfort: The gear that makes cycling enjoyable rather than just endurable.
- Tier 3 — Performance: Upgrades for when you’re riding regularly and want to improve.
This isn’t about gatekeeping cycling or making it expensive. It’s about spending in the right order so that nothing important gets skipped. Work through the tiers as your budget and commitment grow.
The Essential Cycling Accessories Every Beginner Needs
These are your Tier 1 items. Get these sorted before your first proper ride — no exceptions.
Helmet — The One You Should Never Skip
Let’s start with the most important item on this entire list.
A cycling helmet is not optional. It doesn’t matter if you’re doing a gentle loop around the park or a 30-mile weekend ride — a helmet is the single most impactful piece of safety kit you’ll ever buy. And yet, it’s also the accessory most commonly skipped on the first purchase because “I’m only going for a short ride.”
Short rides have crashes too.
The ROCKBROS Bike Helmet is a solid choice for beginners precisely because it doesn’t force you to compromise. It combines reliable impact protection with practical everyday features — good ventilation to keep your head cool on longer rides, an adjustable retention system so it fits securely without pressure points, and a design that doesn’t look like it belongs exclusively in the Tour de France peloton.
What to look for when choosing a helmet:
- Fit: A helmet should sit level on your head, roughly two finger-widths above your eyebrows. It should feel snug without pressure points, and the chin strap should allow no more than two fingers between strap and chin.
- Ventilation: More vents mean better airflow and a cooler ride. If you’re commuting in warm weather, this matters more than you’d expect.
- MIPS technology: MIPS stands for Multi-directional Impact Protection System — a low-friction liner inside the helmet that reduces rotational force during angled impacts, the kind most common in real crashes. Worth paying slightly more for if your budget allows.
- Safety certification: Look for CE EN1078 certification as a minimum in the EU and UK.
Entry-level helmets that tick all these boxes start from around £30–£40. You don’t need a £150 aero lid on day one — but don’t go bargain-bin either. This is the one item where quality genuinely matters.

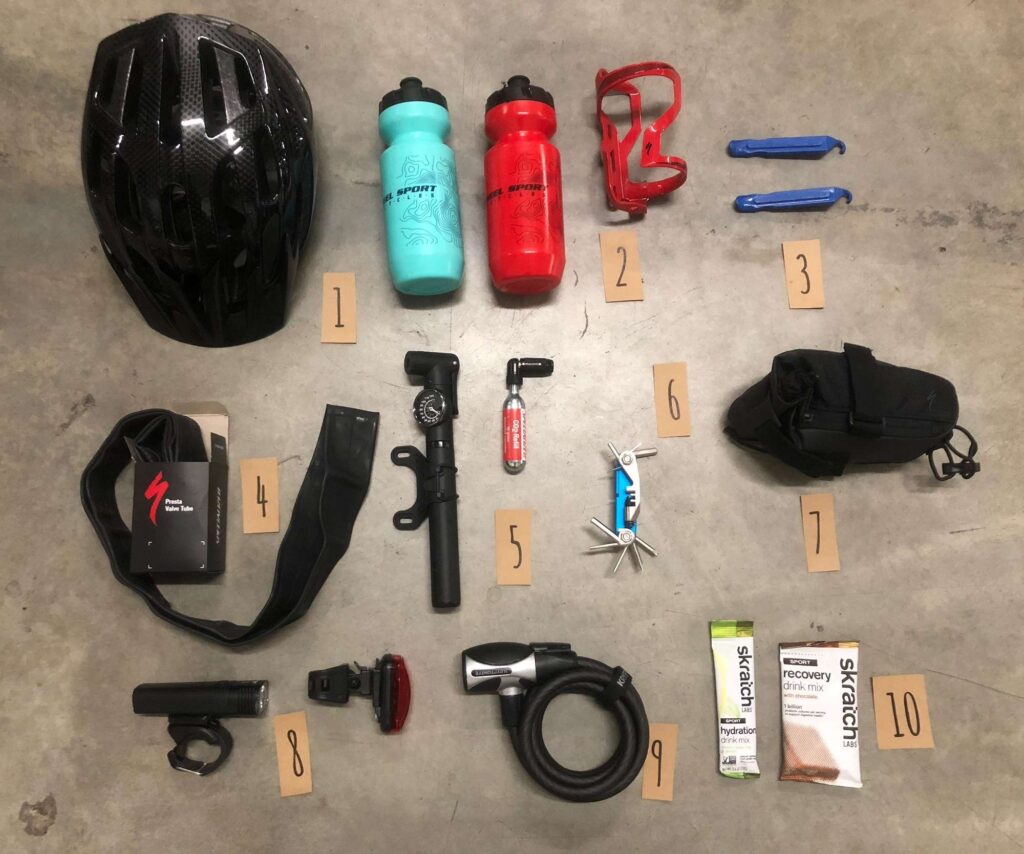
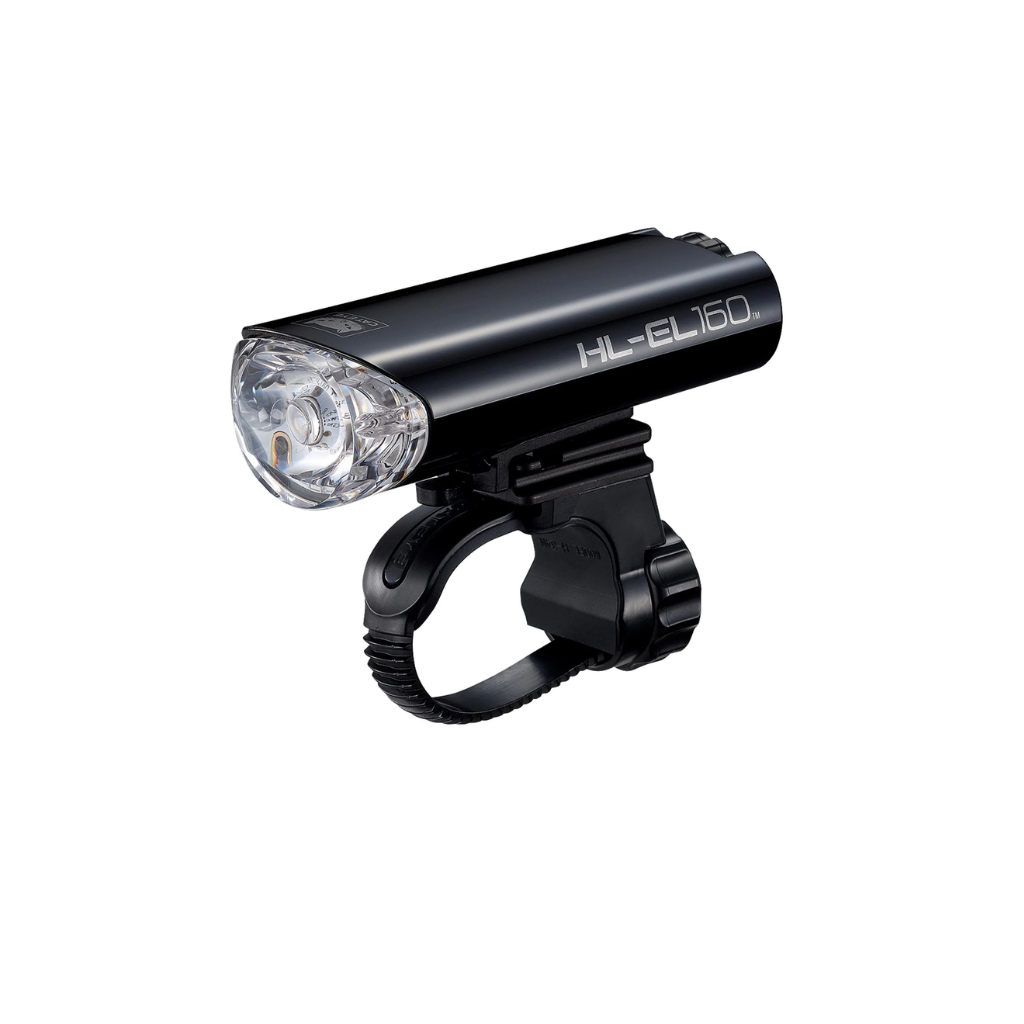
Bike Lights — Front and Rear, Always
If there’s any chance you’ll ride in anything less than full daylight — early mornings, autumn evenings, overcast skies, underpasses — you need lights. In the UK and across much of Europe, cycling without lights after dark is a legal offence. More importantly, being seen by drivers is simply non-negotiable.
The minimum you need:
- One white front light
- One red rear light
For commuting and general riding, look for a front light with at least 200–400 lumens for daytime visibility and 400+ lumens for riding in actual darkness. For rear lights, 30–100 lumens in flash mode is highly effective at grabbing a driver’s attention.
USB rechargeable lights are worth the slightly higher upfront cost. You’ll use them regularly, and buying batteries every few weeks adds up fast — both in money and in the very specific frustration of realising your light is dead five minutes before you set off. A good rechargeable set lasts for years and typically costs £20–£40 for the pair.
Bike Lock — Because Your Bike Deserves Better Than a Cable Tie
Your bike is an investment. A good lock protects it. A cheap one gives thieves a 10-second challenge.
Here’s a quick breakdown of the main lock types:
| Lock Type | Security Level | Weight | Best For |
|---|---|---|---|
| D-lock (U-lock) | High | Medium | Urban commuting, high-risk areas |
| Chain lock | Medium–High | Heavy | Flexible locking positions |
| Folding lock | Medium | Light–Medium | Commuters wanting portability |
| Cable lock | Low | Very light | Secondary lock only |

For most beginners, a mid-range D-lock rated Sold Secure Silver or Gold is the best starting point. It offers a strong balance of security, portability, and value. A D-lock is a hardened steel U-shaped lock — far harder to cut than a chain of equivalent price.
The golden rule of locking a bike: always lock through the frame and at least one wheel, and secure it to something fixed and immovable. A lock that only goes through the wheel can leave you standing next to a wheel still attached to a post while your bike disappears. More than a few cyclists have learned this one the hard way.
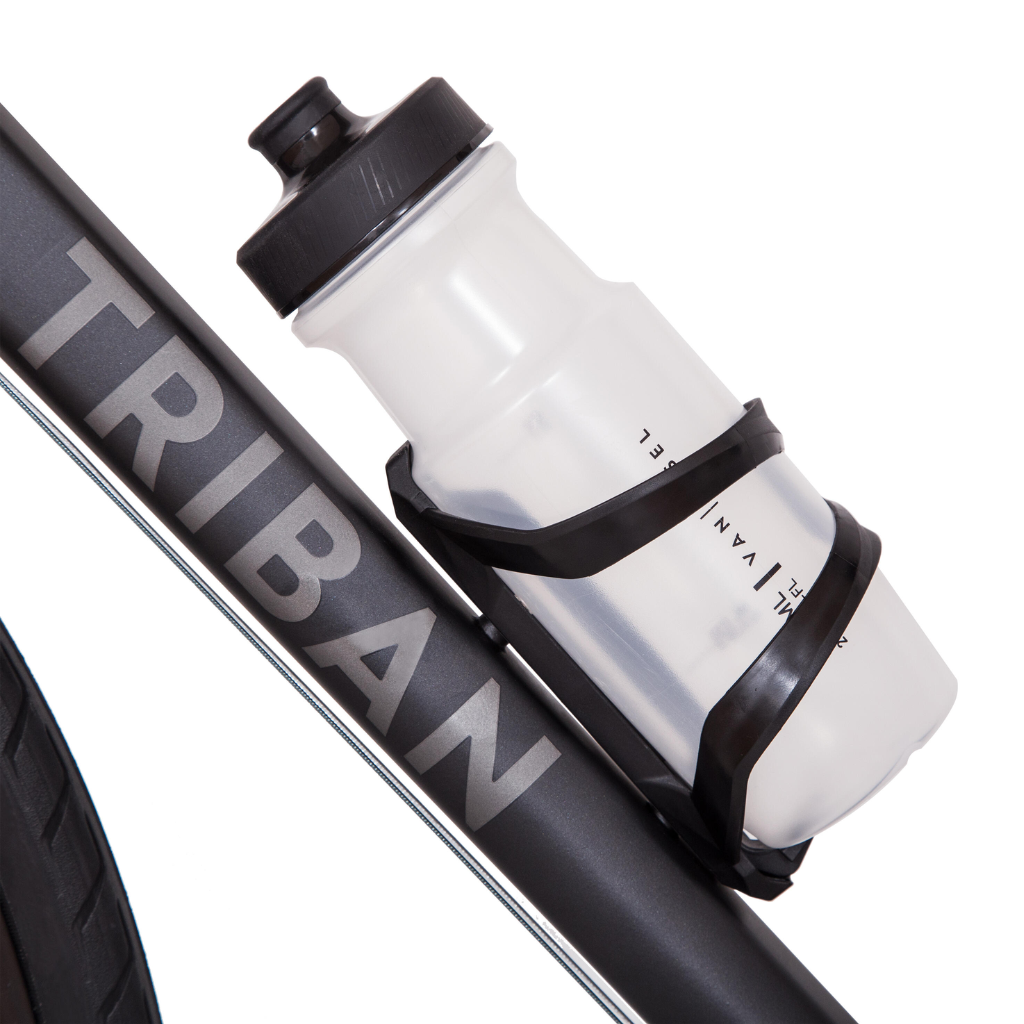
Water Bottle and Cage — Hydration Is Not Optional
Cycling burns energy and fluid faster than most beginners expect. Even on a 45-minute ride in mild weather, dehydration can creep in and turn a good ride into a heavy one. The fix is cheap and simple: carry water.
Most road and hybrid bikes have pre-drilled bottle cage mounts on the frame. A basic cage costs under £10 and accepts standard 600ml or 750ml cycling water bottles.
What to look for:
- BPA-free materials — you’ll be drinking from this in the sun
- Easy one-handed access — you’ll be grabbing it mid-pedal
- Wide mouth for easy filling and cleaning
- Insulated options if you prefer cold water on longer rides
If your bike doesn’t have cage mounts, handlebar-mounted and seatpost-mounted cages are widely available and attach without any tools.
Puncture Repair Kit — Your Roadside Emergency Kit
A flat tyre is cycling’s version of a dead phone battery: mildly inconvenient when you’re prepared, genuinely miserable when you’re not. Getting a puncture is a rite of passage — it will happen. The only question is whether it happens three miles from home with a repair kit in your bag, or three miles from home without one.
Your basic puncture kit should include:
- Tyre levers (2–3) to remove the tyre from the rim
- A spare inner tube — replacing the tube is faster than patching roadside; patch it at home later
- A mini pump or CO2 inflator to reinflate once you’ve swapped the tube
- Patches for emergencies when you’ve already used your spare tube
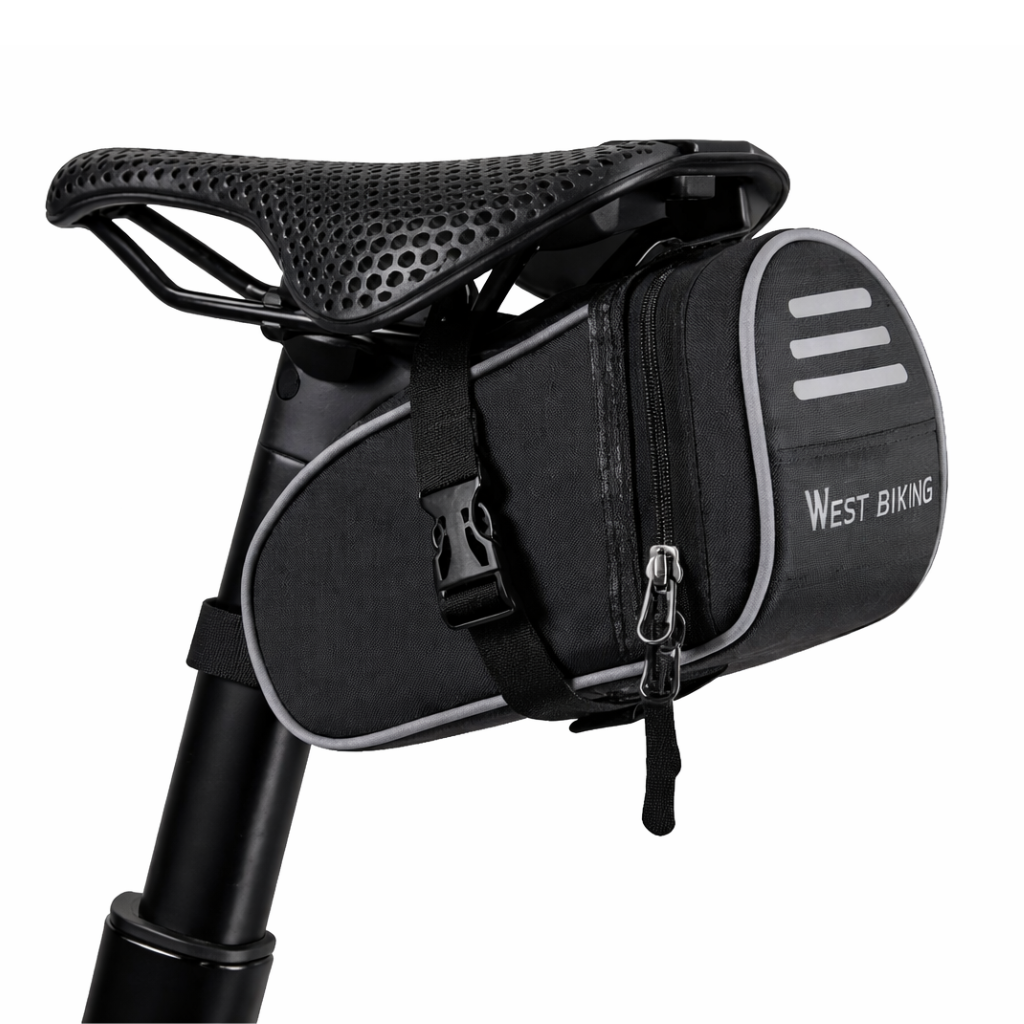
The WEST BIKING Saddle Bag is the ideal home for all of this. It attaches neatly under your saddle, holds a spare tube, tyre levers, and a mini pump without bulk, and means your repair kit is always with you — even on a quick ride where you didn’t think to check your pockets. Before you need it on the road, spend 10 minutes watching a YouTube tutorial on changing an inner tube. It’s one of those skills that takes five minutes to learn and prevents enormous stress when the moment arrives.
Essential Accessories at a Glance
| Accessory | Why You Need It | Approx. Budget |
|---|---|---|
| ROCKBROS Bike Helmet | Head protection — always wear one | £30–£80 |
| Front + rear lights | Visibility and legal requirement | £20–£50 |
| Bike lock (D-lock) | Theft prevention | £25–£60 |
| Water bottle + cage | Hydration during rides | £10–£25 |
| WEST BIKING Saddle Bag + repair kit | Roadside self-sufficiency | £15–£30 |
Clothing and Comfort Accessories for New Cyclists
Once your safety kit is sorted, comfort becomes the priority. Cycling-specific clothing is one of those things that feels like an unnecessary expense — until you try it on your first longer ride, at which point it becomes very difficult to imagine going back.
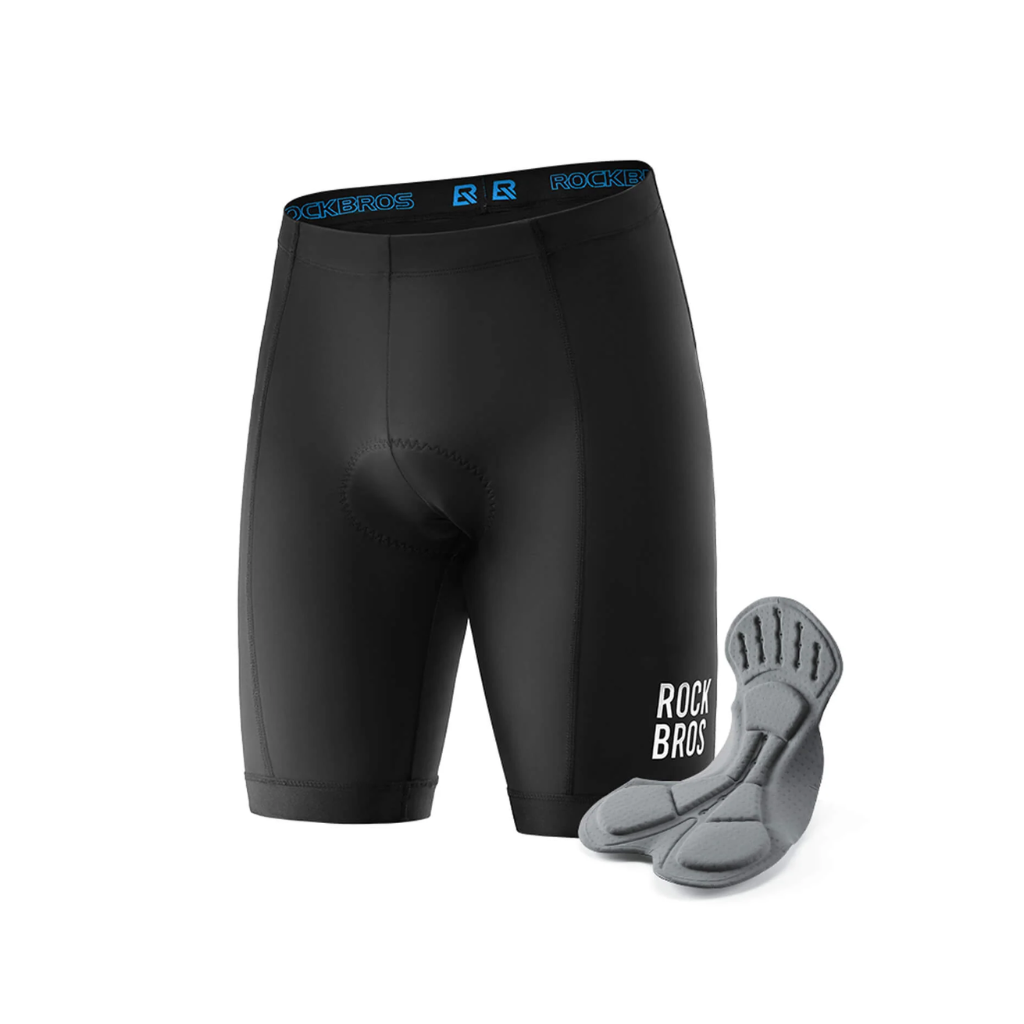
Padded Cycling Shorts — The Game Changer
If there is one single piece of clothing that will transform your early experience of cycling, it’s padded shorts.
The padding inside cycling shorts is called a chamois (pronounced “shammy”) — a foam or gel insert built into the seat area that cushions against saddle pressure and reduces friction between skin and fabric. Saddle soreness is consistently one of the top reasons new cyclists cut their rides short or stop altogether. Padded shorts address this directly.
The ROCKBROS Cycling Underpants are a smart option for beginners who aren’t ready to commit to the full lycra look. They function as a padded liner that can be worn under regular shorts or cycling trousers, giving you all the chamois benefit without changing how you look on the bike. For those ready to go full cycling kit, the ROCKBROS Cycling Pants offer structured compression, chamois padding, and a fit designed specifically for time in the saddle.
A few things worth knowing before you buy:
- Wear padded shorts or underpants without underwear underneath. Underwear seams create friction points that completely defeat the purpose of the chamois. No underwear. Trust the process.
- Bib-style shorts — the ones with shoulder straps — tend to stay in place better than waistband designs on longer rides.
- If you run cold or plan to ride in autumn and winter, the ROCKBROS Thermal Windproof Leg Warmers are a practical addition. They slide over your shorts or cycling pants and protect your knees and quads from wind and cold without requiring a full wardrobe change for every season.
Entry-level padded options start from around £20–£35 and are worth every penny.
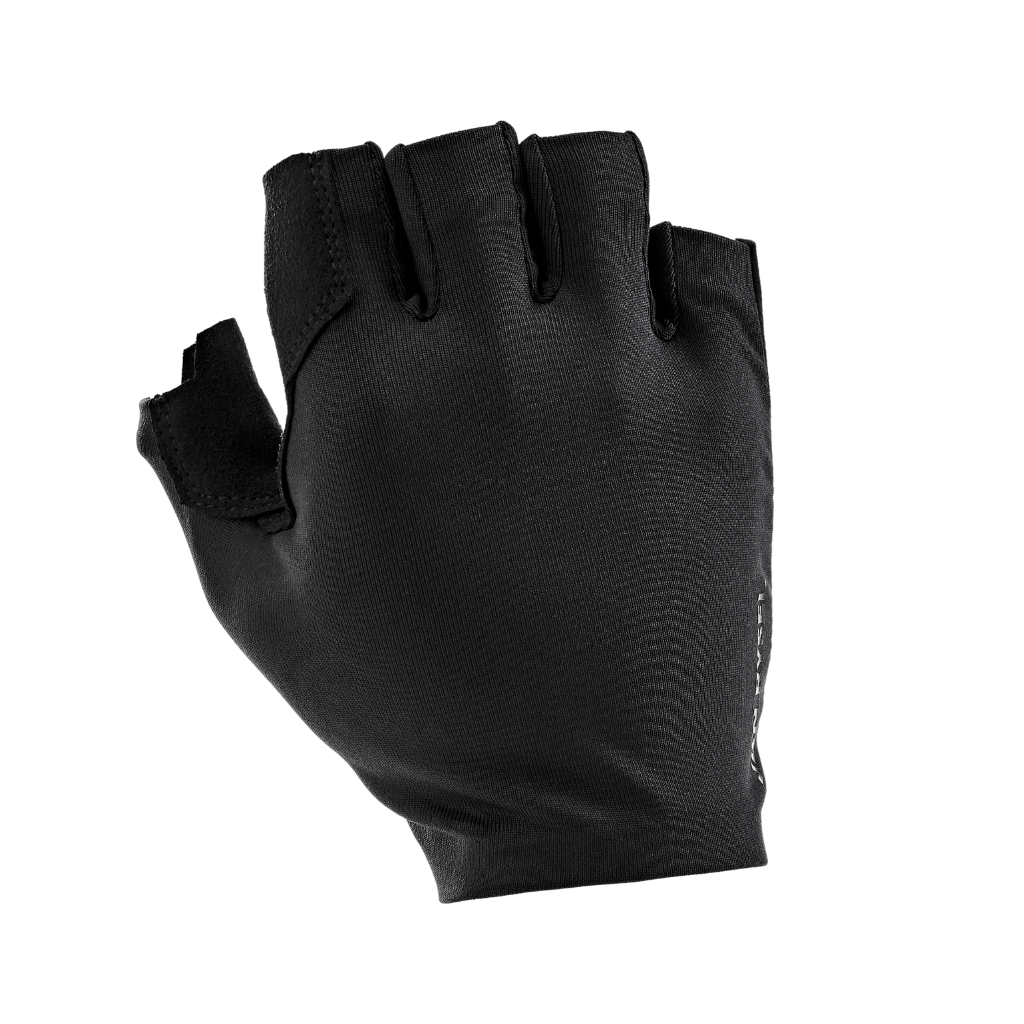
Cycling Gloves — More Than Just Hand Warmers
Cycling gloves do two things that beginners tend not to appreciate until they’ve ridden without them: they dampen road vibration, and they protect your palms if you fall.
Road surfaces — even smooth ones — transmit a continuous buzz through the handlebars into your hands. Over a 30-minute ride, this is noticeable. Over two hours, it’s fatiguing. The ROCKBROS Cycling Gloves are designed specifically to address this, with palm padding that absorbs vibration and a breathable back that keeps your hands comfortable across a range of temperatures. The grip is also noticeably better than bare hands when handlebars get wet — which, depending on where you ride, is not an unlikely scenario.
The second benefit is more straightforward: if you come off the bike, your instinct is to put your hands out. Gloves take the brunt of that impact instead of your skin.
For warmer months, fingerless mitts keep things light and ventilated. When temperatures drop, full-finger gloves become essential — bare fingers lose dexterity quickly in cold wind, which affects your ability to brake safely.
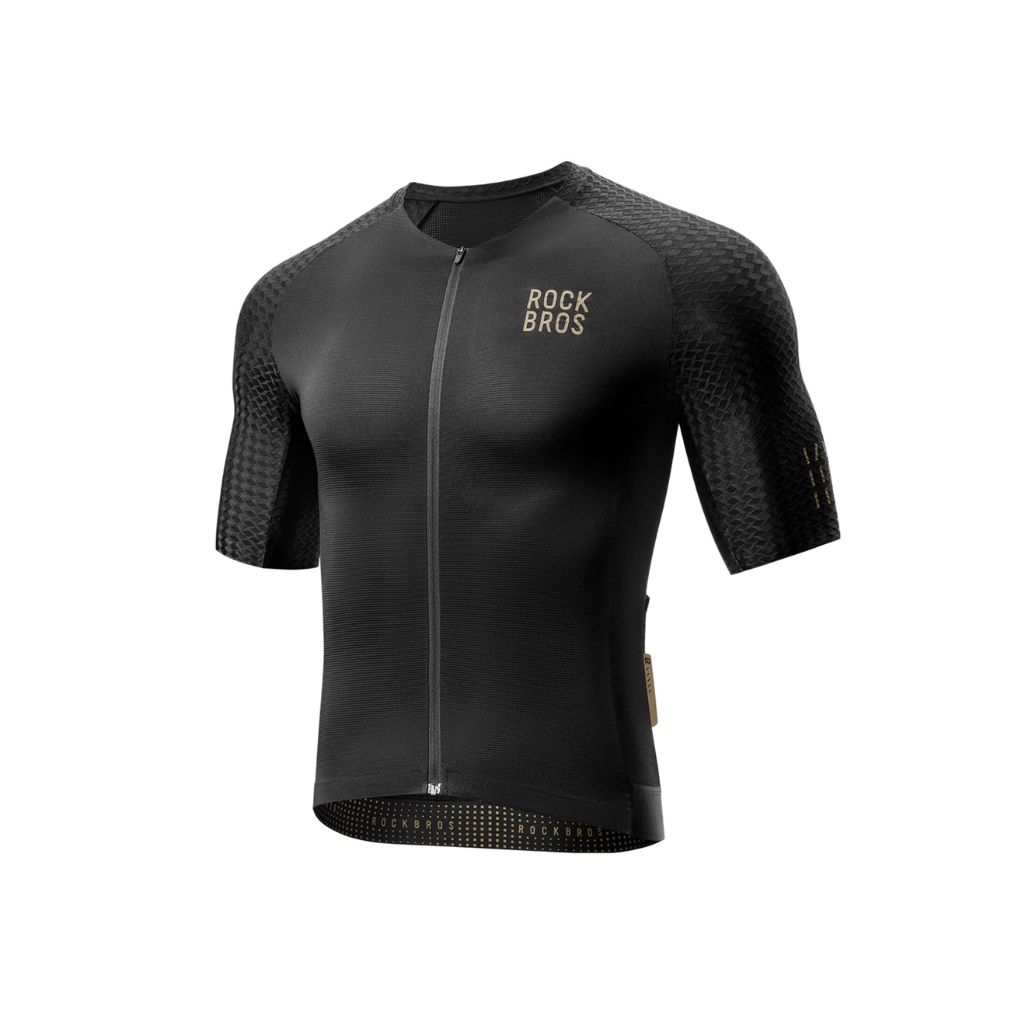
Cycling Jersey — Practical, Not Just Aesthetic
A cycling jersey often gets dismissed as a “serious cyclist” purchase. In reality, the practical benefits are relevant from your very first longer ride.
The ROCKBROS Cycling Jersey and the X-Tiger Short Sleeve Cycling Jersey are both excellent options depending on your riding style. The ROCKBROS jersey is built for performance-oriented riders — moisture-wicking fabric, a close aerodynamic fit, and three rear pockets that are genuinely useful for carrying your phone, a snack, or your repair kit without anything bouncing in a rucksack. The X-Tiger Short Sleeve Jersey is a slightly more relaxed fit, making it a great choice for beginners who want the technical benefits of a proper cycling jersey without the full race-fit feel.
Both jerseys manage sweat effectively, which matters more than most beginners expect. A soaked cotton t-shirt clings to your skin, chills you when you stop, and gets uncomfortable fast. A proper cycling jersey handles moisture and temperature regulation in a way that makes rides of all lengths more comfortable.
If you’re riding in cooler conditions or want a versatile layering option, the Base Layer Shirt worn underneath either jersey gives you an extra level of thermal regulation — wicking moisture away from the skin while the jersey manages wind and external temperature.
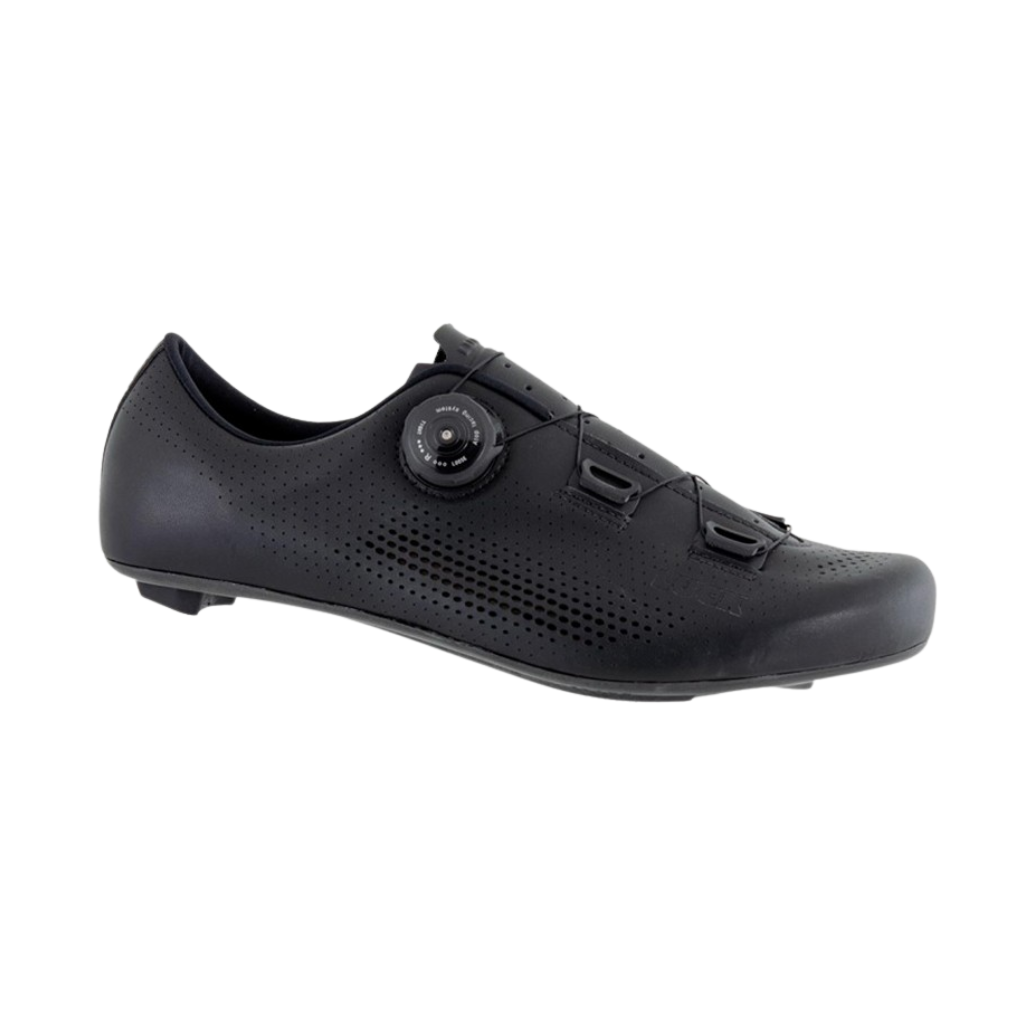
Cycling Shoes — An Upgrade Worth Planning For
Cycling shoes deserve an honest mention, but with an equally honest caveat: they are not a day-one purchase for most beginners.
Here’s the context. Cycling shoes have a stiff sole that transfers power from your legs to the pedals far more efficiently than a soft trainer. The flex in a standard running shoe absorbs energy that should be going into your pedal stroke.
Clipless shoes — confusingly, the ones that do clip in to compatible pedals — take this further by locking your foot to the pedal for a more efficient and natural stroke. The two systems most beginners encounter are:
- SPD (Shimano Pedalling Dynamics): A two-bolt system with recessed cleats, popular for commuting and mountain biking. Walkable in normal life.
- Road cleats (3-bolt): Larger cleat, more power transfer, considerably less practical for walking — you’ll hear them clicking on every floor surface you encounter.
The recommendation: ride in trainers for your first few months. Once you’re cycling regularly, committed to the hobby, and starting to think about efficiency, upgrade your pedals and shoes together. It’s a meaningful difference — but only once you’re ready for it.
Useful Accessories to Add Once You’re Comfortable
You’ve been riding regularly for a few weeks. The essentials are covered, the padded shorts have changed your life, and now you want to keep building. Here’s what to add in Phase 2.
Cycling Backpack or Saddle Bag — Carry What You Need
Once your rides start getting longer or you’re commuting by bike, carrying capacity becomes a genuine consideration. The WEST BIKING Cycling Backpack is designed for exactly this stage — it’s compact enough not to feel burdensome on the bike, has dedicated compartments for tools, a laptop, and clothing, and sits close to your back to minimise the swaying that makes ordinary rucksacks annoying at cycling speeds.

If you prefer to keep your back free entirely, the WEST BIKING Saddle Bag (mentioned earlier for your repair kit) is available in sizes large enough to carry a jacket, extra layers, and additional spares for longer rides. Many cyclists use both — the saddle bag for repair essentials, the backpack for commuting days when they need to carry more.
Cycling Glasses — More Useful Than They Look
The ROCKBROS Polarized Cycling Glasses are worth adding to your kit once you’re riding regularly, particularly if you do any riding on roads with traffic or in variable weather.
Polarized lenses reduce glare from wet road surfaces — something that makes a real practical difference in low-angle morning or evening sunlight when riding towards the light. Beyond glare, the wraparound design keeps wind, insects, and road spray out of your eyes at speed. Standard sunglasses don’t fit close enough to the face to do this effectively, and at 20mph the difference between a shield and a gap is noticeable within minutes.
The interchangeable lens system means you’re not stuck with one tint for all conditions — clear lenses for low-light riding, tinted for full sun, and yellow or orange for overcast days where contrast matters.
Arm Sleeves and Weather Layers — Dress for the Ride, Not the Start
One of the most common beginner mistakes is dressing for the temperature at the start of a ride rather than the temperature 20 minutes in. Cycling generates heat quickly, and what felt comfortable at the front door often feels warm within the first few kilometres of effort.
The ROCKBROS Sports Arm Sleeves solve this problem elegantly. They provide UV protection and a light layer of warmth that can be rolled down or removed entirely mid-ride and stuffed into a jersey pocket — something you can’t do with a jacket. They’re particularly useful in spring and autumn when mornings are cool but afternoons warm up.
For genuinely cold or wet conditions, the ROCKBROS Thermal Windproof Cycling Vest adds core warmth without restricting arm movement, and the ROCKBROS Raincoat Jacket is a lightweight, packable option for rides where weather might turn. Neither is a day-one essential, but both make the difference between a miserable wet ride and one you’d happily do again.

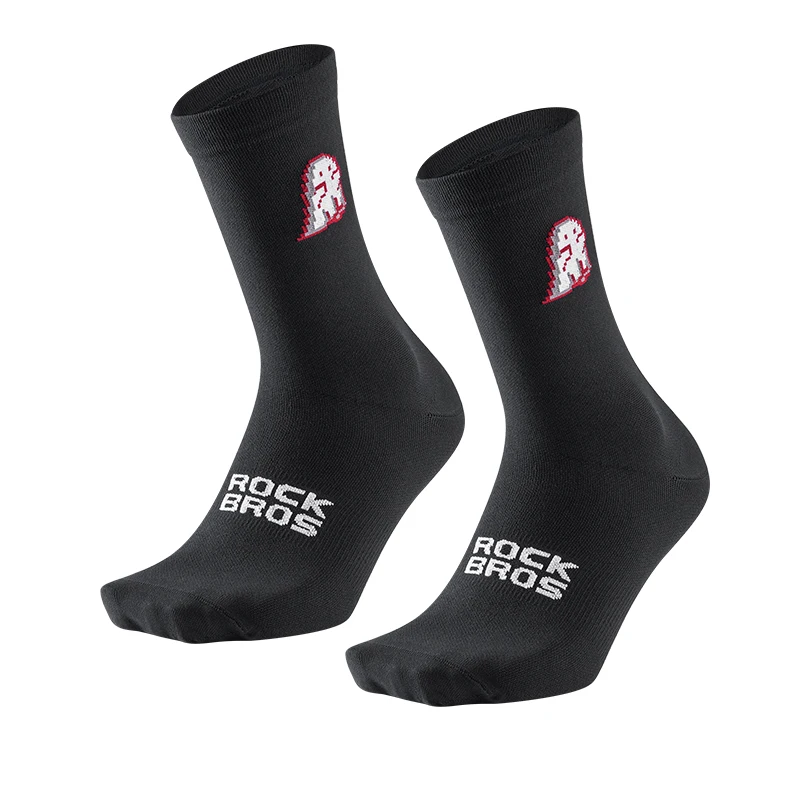
Cycling Socks — A Small Detail That Matters
It sounds minor, and compared to a helmet or padded shorts, it is. But ROCKBROS Professional Cycling Socks are worth mentioning because cycling-specific socks are genuinely different from regular sports socks in ways that matter: they’re thinner (which improves pedal feel), more breathable in the areas that need it, and cut to avoid bunching in cycling shoes or causing pressure points on longer rides.
They’re also one of the most affordable upgrades on this entire list, which makes them an easy addition at any stage.
What You Don’t Need to Buy Right Away
Here’s something refreshing to hear from a cycling store: you genuinely don’t need everything at once.
One of the most common beginner mistakes is trying to assemble the full pro setup before ever having ridden more than five miles. It’s understandable — the marketing is good, and new gear is fun. But it’s also the fastest way to spend a lot of money on things that won’t make a meaningful difference yet.
Things that can absolutely wait:
- Carbon fibre components of any kind — save carbon for when your fitness outpaces your equipment
- Power meters — training tools for competitive athletes, not relevant until you have a structured plan
- Aero helmets — designed for time trialists; at typical beginner speeds, the aerodynamic benefit is negligible
- A full matching kit — a fine aspiration, not a requirement for enjoying your first few months
- Top-end cycling shoes — mid-range works identically when starting out
Buy smart. Ride more. Upgrade when the need is genuinely there.

How to Build Your Beginner Cycling Kit on a Budget
The staged approach below lets you start safely, improve your comfort as you ride more, and invest in performance gear only once cycling has proven itself worth it to you.
Phase 1 — Before Your First Ride (Target: under £150 total)
- ROCKBROS Bike Helmet — £35–£60
- Front + rear lights — £20–£40
- Bike lock (D-lock) — £25–£50
- Water bottle + cage — £10–£20
- WEST BIKING Saddle Bag + puncture repair kit — £15–£25
Phase 2 — First Month of Riding (Add £50–£100)
- ROCKBROS Cycling Underpants or Cycling Pants — £20–£40
- ROCKBROS Cycling Gloves — £15–£25
- Base Layer Shirt — £15–£25
Phase 3 — Once You’re Riding Regularly (Add £100–£200)
- ROCKBROS Cycling Jersey or X-Tiger Short Sleeve Cycling Jersey — £30–£60
- ROCKBROS Polarized Cycling Glasses — £20–£45
- ROCKBROS Sports Arm Sleeves or Thermal Windproof Leg Warmers — £15–£30
- ROCKBROS Professional Cycling Socks — £8–£15
This phased approach means your first outlay is realistic, your comfort improves naturally as you ride more, and you’re only spending on performance gear once you know cycling is genuinely for you.
Frequently Asked Questions
What accessories do I need for my very first bike ride? At an absolute minimum: a properly fitted helmet — the ROCKBROS Bike Helmet is a reliable starting point — front and rear lights if there’s any chance of reduced visibility, and a water bottle. Adding a lock and a puncture kit before that first ride is strongly recommended, but if you’re doing a short loop near home in full daylight, the helmet and lights are the true non-negotiables.
Are padded cycling shorts really necessary for beginners? Not strictly necessary for a single short ride — but if you plan to cycle regularly, they make a significant difference to comfort from rides of 30–45 minutes upwards. Saddle soreness is one of the most common reasons beginners stop riding. The ROCKBROS Cycling Underpants are a great entry point if you’re not ready for full cycling pants — you get all the chamois benefit while still looking like a normal person on a bike.
How many bike lights do I need? Two: one white at the front, one red at the rear. In most European countries this is a legal requirement after dark. Even in daylight, a flashing rear light significantly increases your visibility to drivers — many experienced cyclists run a rear light on every ride regardless of conditions.
What is the best bike lock for a beginner? A mid-range D-lock rated Sold Secure Silver is the best starting point for most beginners. It offers strong security, reasonable portability, and good value. Cable locks are fine as a secondary lock but should never be your only security — they can be cut in under 10 seconds with basic tools.
Do I need cycling shoes straight away? No. Standard trainers are perfectly fine for your first weeks and months of cycling. Clipless cycling shoes are a worthwhile upgrade once you’re riding regularly and want to improve pedalling efficiency — but they come with a learning curve, require compatible pedals, and there’s genuinely no rush.
Conclusion
The best cycling accessories for beginners aren’t the most expensive ones — they’re the right ones, bought in the right order. Start with safety, build in comfort, and let performance gear come naturally as your riding develops.
None of the items on this list are there for show. Every one of them — from the ROCKBROS Bike Helmet to the WEST BIKING Saddle Bag to the ROCKBROS Cycling Gloves — has a genuine, practical reason to be in your kit, whether that’s keeping you safe, making your rides more enjoyable, or helping you handle the inevitable flat tyre without ending up stranded somewhere you’d rather not be.
Approach it in phases, spend wisely, and focus on time on the bike. The gear will follow.
Ready to kit yourself out? Browse the full range of cycling accessories and clothing at Pedalmax — everything on this list, in one place, with options for every budget and every stage of the journey.